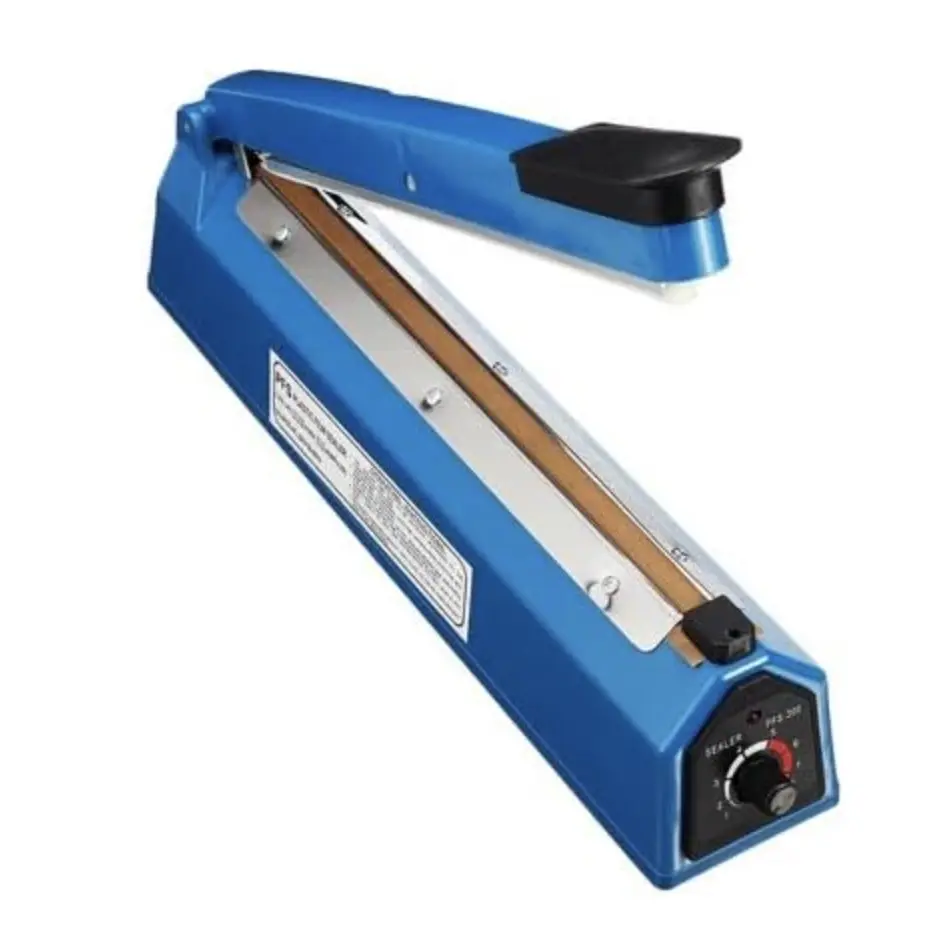
This device is an Impulse Heat Sealer, a staple tool for packaging, retail, and small-scale manufacturing. It is designed to create airtight and watertight seals on various plastic films and bags by applying a quick burst of heat and pressure.
How It Works
Unlike “constant heat” sealers that stay hot all day, an impulse sealer only draws power and generates heat when the arm is pressed down. A high-resistance wire (usually Nichrome) heats up instantly, melting the plastic layers together, and then cools down almost as quickly to set the seal.
Key Components & Usage
- Sealing Arm: The lever used to apply pressure. It usually features a silicone rubber strip to ensure even contact.
- Heating Element: The thin wire or ribbon located under a protective Teflon (PTFE) tape layer. This tape prevents the plastic from sticking to the machine.
- Timer Knob: Adjusts the duration of the heat “pulse.” Thicker bags (like Mylar) require a higher setting, while thin poly bags need very little heat.
- Indicator Light: Usually turns on when the heating cycle starts and off when it’s safe to release the arm.
Quick Reference: Material Compatibility
| Material | Sealing Difficulty | Common Use Case |
| Polyethylene (PE) | Easy | Sandwich bags, light packaging |
| Polypropylene (PP) | Moderate | Shiny, crinkly snack bags |
| Mylar / Foil | Harder | Long-term food storage (requires higher heat) |
| Bubble Wrap | Easy | Shipping protection |
Pro-Tips for a Perfect Seal
Dialing it In: Start at a low setting (2 or 3) and move up until you get a clean seal. If the plastic melts through or deforms, your setting is too high.
The “2-Second Rule”: After the light goes out, keep the arm pressed down for an extra 1–2 seconds. This allows the plastic to “dwell” and solidify, resulting in a much stronger bond.
Maintenance: If you notice smoke or the plastic is sticking, it’s time to replace the Teflon tape. Using the sealer with a burnt or torn tape can snap the heating element.